After the Capture Calibration routine is completed, the user measures surface features contained within each image and enters their dimensions into the software. The software compares its estimates with the actual (user-entered) dimensions to make final corrections. This portion of calibration is carried out using the Calibrate > Scanner > Auto Calibration... command.
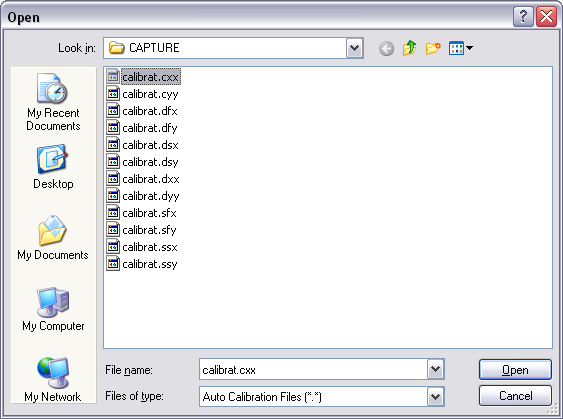
The system will prompt the user to select the calibration image:
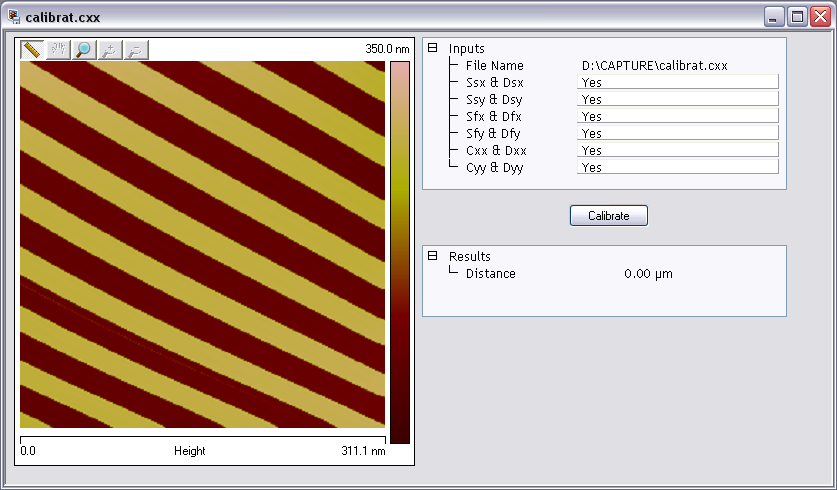
In the right upper Input panel, set those you wish to calibrate to Yes and those you wish to skip to No. For normal calibration, verify that all parameters are selected.


The software displays the span of that drawn line initially in the New Distance field (e.g. 105 μm in the upper image) and in the Results / Distance /Value field. This value is the software’s estimate of the length of the line based on the current calibration values. Input the known value (e.g. 100 μm the upper image) in the New Distance field to reflect the correct line length.
If the Capture Calibration and Auto Calibration routines are completed correctly, the SPM will be calibrated within 1–2 percent accuracy over most of the scanner’s measuring range. To obtain still better accuracy, the SPM can be fine-tuned to obtain maximum measurement accuracy (see Fine-tuning for XY Calibration).
| www.bruker.com | Bruker Corporation |
| www.brukerafmprobes.com | 112 Robin Hill Rd. |
| nanoscaleworld.bruker-axs.com/nanoscaleworld/ | Santa Barbara, CA 93117 |
| Customer Support: (800) 873-9750 | |
| Copyright 2010, 2011. All Rights Reserved. |